1. Introduction: Understanding the Challenges of Deploying Node.js Apps
Deploying a Node.js application can often feel like you’re trying to fit a square peg into a round hole, especially when aiming for scalability and efficiency. Many developers struggle with performance bottlenecks, server downtime, and complex scaling issues as their applications grow. Node.js, being single-threaded, handles asynchronous I/O operations excellently but can falter under heavy CPU-bound tasks unless properly managed.
The key to successful deployment lies in understanding the architecture of Node.js and how it interacts with the underlying server environment. This involves choosing the right hosting provider and configuring your servers to handle the unique demands of Node.js applications. Scalability concerns, such as handling large volumes of connections and data processing efficiently, are paramount.
For developers looking to deploy Node.js applications, choosing a cloud provider like Kamatera offers flexibility and scalability. With Kamatera, you can easily scale your resources up or down based on demand, ensuring that your application remains efficient and cost-effective. Try Kamatera to experience the ease of managing Node.js applications with scalable cloud infrastructure.
2. Setting Up Your Node.js Environment on Kamatera Cloud
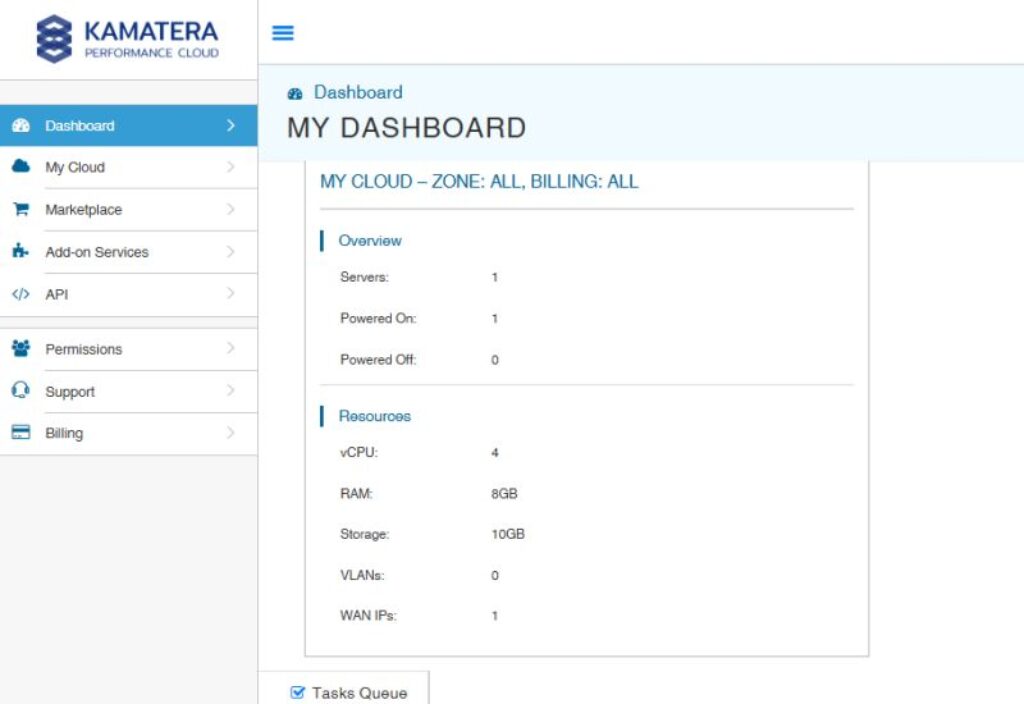
Setting up your Node.js environment on Kamatera Cloud begins with selecting the appropriate server configurations. Start by choosing a server with adequate CPU and RAM based on your application’s requirements. For a typical Node.js application, a balanced VPS with multi-core processors and sufficient memory can handle multiple Node.js instances to utilize all CPU cores, maximizing throughput.
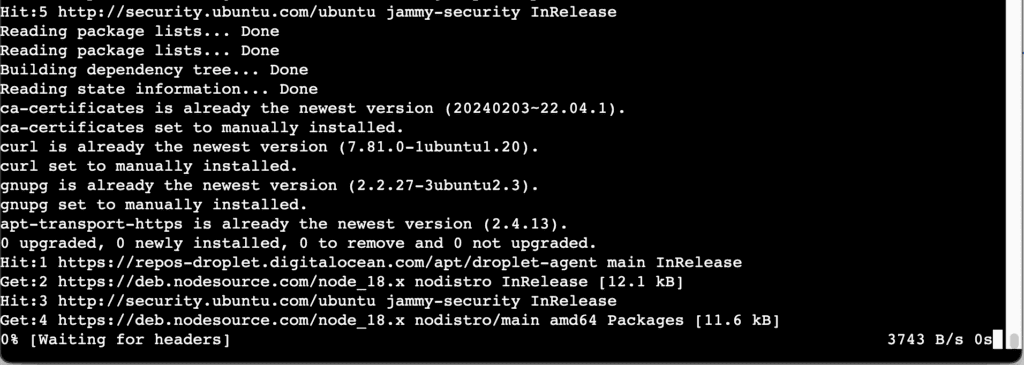
Once you’ve chosen your server, install Node.js. Kamatera supports various operating systems, but for Node.js, a Linux-based server, such as Ubuntu, is often preferred for its stability and community support. You can install Node.js using a package manager like apt:
sudo apt update

sudo apt install nodejs

sudo apt install npm
This setup provides you with both Node.js and npm (Node Package Manager), essential for managing your Node.js applications.Next, deploy your application code to the server. You can use Git for version control and pull your code directly to your Kamatera server. Set up environment variables and dependencies, then start your application using a process manager like PM2. This tool helps keep your app running in the background and provides simple commands to manage application processes.
3. Best Practices for Scalable Node.js Deployment
Scalability in Node.js is achievable by implementing a few best practices starting with the architecture of your application. Design your app with microservices or modular components that can scale independently. This approach not only improves manageability but also enhances the scalability of the application by distributing the workload across multiple instances.
Load balancing is another critical aspect. Use Kamatera’s load balancers to distribute client requests across multiple instances of your Node.js application, ensuring no single instance becomes a bottleneck. This setup improves response times and application availability. Configure your load balancer to handle session persistence appropriately, essential for applications that require user session data.
Caching is your friend when it comes to reducing database load and speeding up response times. Implement caching strategies using Redis or similar caching systems to store frequently accessed data. This reduces the need to fetch data from the database on each request, thereby speeding up response times and reducing load on your server.
4. Integrating Monitoring Tools for Enhanced Performance Management
Monitoring is crucial in managing the performance of Node.js applications, especially when deployed at scale. Start by integrating a comprehensive monitoring tool that can track application performance metrics, such as response times, system load, and error rates. Tools like New Relic or Datadog provide deep insights into your application and system health, allowing you to react quickly to potential issues.
Set up alerts for critical metrics that could indicate problems with your Node.js application. For example, memory leaks in Node.js can lead to significant performance issues and eventual crashes. Monitoring tools can alert you to unusual spikes in memory usage, allowing you to intervene before users are affected.
Lastly, make use of the logging capabilities of your monitoring tools. Detailed logs can help you debug issues and understand the behavior of your application under different loads. Configure your logging levels appropriately to capture errors and warnings without overwhelming your log files with unnecessary information.
Bonus Tips for Node.js Developers
Utilize Environment Variables: Keep your application’s configuration flexible and secure by using environment variables for sensitive keys and application settings. This practice is crucial when scaling applications across multiple environments.
Implement CI/CD: Automate your deployment process with Continuous Integration and Continuous Deployment pipelines. This not only speeds up your deployment process but also reduces human errors.
Use Docker Containers: For ease of deployment and consistency across different environments, containerize your Node.js application using Docker. This ensures that your app runs the same way, everywhere, every time.
By following these guidelines and leveraging Kamatera’s powerful cloud infrastructure, developers can deploy scalable and efficient Node.js applications that are robust and responsive to changing load conditions. Try Kamatera to streamline your Node.js application deployment with cutting-edge cloud solutions.