Deploying a Node.js app can feel overwhelming when you’re moving from local dev to real-world production. You may have tried shared hosting or even used AI-generated deployment guides that left you more confused than helped. If you’ve ever thought, “Why is my app fast locally but crashes live?” — you’re not alone.
In this guide, we’ll walk you through the exact steps to deploy your Node.js app using a Kamatera VPS, so it runs fast, securely, and doesn’t break when it gets real traffic.
➜ Try Kamatera’s flexible cloud VPS to deploy your Node.js app now — Start for free
Why Kamatera?
Most devs hit a wall when their shared hosting fails under real load — slow response, no root access, random crashes.
Kamatera solves that by giving you:
- Full control with root access 🔐
- Custom server specs (CPU, RAM, SSD)
- Global data centers for low latency
- A free 30-day trial to test everything
Step 1: Set Up Your Kamatera VPS and see the difference in performance.
👉 Deploy faster with Kamatera — $4/month + 30-day free trial
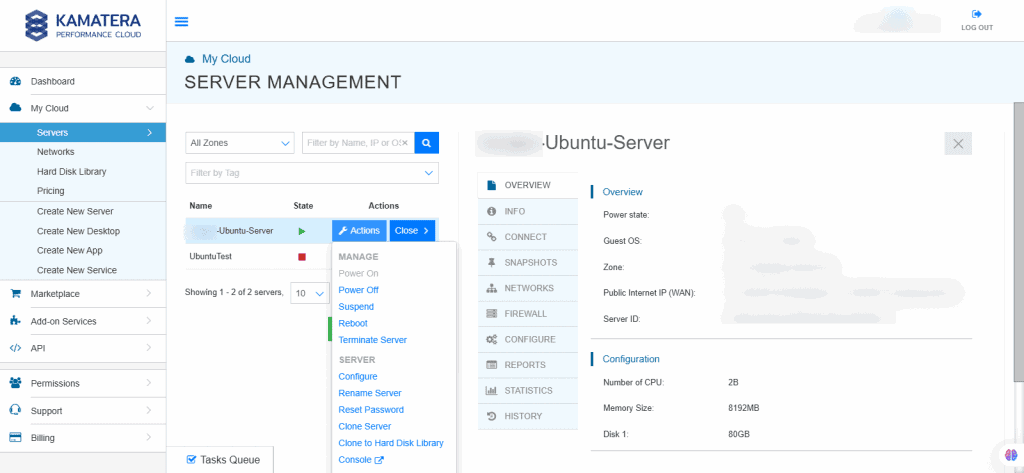
After signing up, go to Kamatera’s cloud management panel and create a new server. Choose your preferred datacenter (closest to your users), set your specs (1 vCPU, 1 GB RAM is enough to start), and pick Ubuntu 22.04 LTS.
Once deployed, you’ll get your VPS IP and root credentials. SSH into the server:
ssh root@your-server-ip
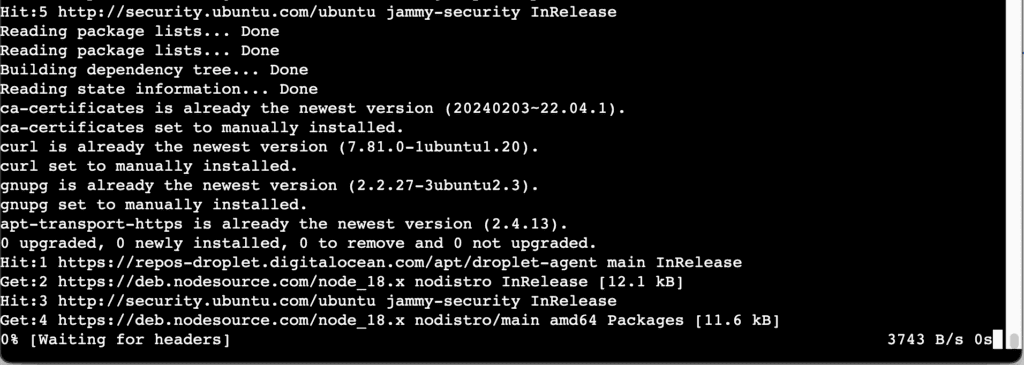
Then update packages:
apt update && apt upgrade -yStep 2: Install Node.js and npm
Install Node.js using the official Nodesource setup:
curl -sL https://deb.nodesource.com/setup_18.x | sudo -E bash -
apt install -y nodejs
Verify:
node -v
npm -v
Now your VPS is ready to run any Node.js app just like on your local machine — but faster.
Step 3: Secure Your Server (Don’t Skip This)
⚡ Boost your Ubuntu cloud — Join Kamatera today!
You’re not on localhost anymore. Here’s how to lock things down:
- Create a new user:
adduser deployer && usermod -aG sudo deployer- Disable root SSH: Edit /etc/ssh/sshd_config, change PermitRootLogin no
- Set up UFW firewall:
ufw allow OpenSSH
ufw enable- Use SSH keys instead of passwords
Kamatera gives you the power — but it’s your job to protect it.
Step 4: Use PM2 to Keep Your App Alive
One crash shouldn’t bring down your app. That’s where PM2 comes in — a production process manager.
Install PM2 globally:
npm install -g pm2
Run your app:
pm2 start app.js
pm2 save
pm2 startup
Now your app auto-restarts on crash or reboot. PM2 also gives logs and performance metrics.
Bonus: Use ecosystem.config.js to define environments for staging, production, etc.
Step 5: Set Up Nginx as a Reverse Proxy
Running your app on port 3000? That’s fine for dev. But in production, you’ll want:
- HTTPS
- Port 80/443
- Friendly domain
Install Nginx:
apt install nginx
Configure reverse proxy:
server {
    listen 80;
    server_name yourdomain.com;

    location / {
        proxy_pass http://localhost:3000;
        proxy_http_version 1.1;
        proxy_set_header Upgrade $http_upgrade;
        proxy_set_header Connection 'upgrade';
        proxy_set_header Host $host;
        proxy_cache_bypass $http_upgrade;
    }
}
Test and reload:
nginx -t && systemctl reload nginxStep 6: Add SSL with Let’s Encrypt
Don’t skip HTTPS — it’s free and boosts trust + SEO.
Install Certbot:
apt install certbot python3-certbot-nginx
Run:
certbot --nginxDone. Your app is now live over HTTPS.
Optional: CI/CD & Docker (For Next Level Devs)
- Use GitHub Actions or GitLab CI for auto-deploy
- Dockerize your app for consistent environments
- Use .env files and dotenv for secure config management
Kamatera handles Docker well, so if your stack gets complex, you’re covered.
💡 Final Tips for Devs Who Want Zero Downtime
- Host your databases and apps on fast cloud! Start now & boost reliability
- Always monitor logs with pm2 logs
- Reboot stress-test before launch
- Use .env for API keys, never hardcode
- Run DBs like MongoDB/PostgreSQL on separate volumes or managed services
✅ Ready to Go Live?
Don’t risk your app on cheap hosting or unreliable AI tutorials.
With Kamatera, you get full control, real performance, and the flexibility to build like a pro.
🎁 Try Kamatera FREE for 30 Days – no credit card surprises, cancel anytime.
and deploy your app the right way, today.
⚡ Bonus: Auto Setup Script for Kamatera VPS (Ubuntu 22.04)
Want to skip manual setup? Use this all-in-one script to configure your Kamatera VPS for Node.js production in minutes. It installs Node.js (v18 LTS), Nginx, PM2, and enables free SSL via Let’s Encrypt.
#!/bin/bash

# Update & install basic tools
sudo apt update && sudo apt upgrade -y
sudo apt install curl ufw nginx -y

# Install Node.js v18 (change to setup_20.x if needed)
curl -fsSL https://deb.nodesource.com/setup_18.x | sudo -E bash -
sudo apt install -y nodejs build-essential

# Install PM2 globally
sudo npm install -g pm2

# Firewall setup
sudo ufw allow 'OpenSSH'
sudo ufw allow 'Nginx Full'
sudo ufw enable

# Sample app setup (optional)
mkdir ~/myapp && cd ~/myapp
echo "console.log('Node.js app is running')" > index.js
pm2 start index.js --name "myapp"
pm2 save
pm2 startup | sudo bash

# Nginx reverse proxy setup
sudo bash -c 'cat > /etc/nginx/sites-available/myapp <<EOF
server {
    listen 80;
    server_name yourdomain.com;

    location / {
        proxy_pass http://localhost:3000;
        proxy_http_version 1.1;
        proxy_set_header Upgrade $http_upgrade;
        proxy_set_header Connection 'upgrade';
        proxy_set_header Host $host;
        proxy_cache_bypass $http_upgrade;
    }
}
EOF'

sudo ln -s /etc/nginx/sites-available/myapp /etc/nginx/sites-enabled/
sudo nginx -t && sudo systemctl restart nginx

# SSL with Let's Encrypt (replace yourdomain.com!)
sudo apt install snapd -y
sudo snap install core; sudo snap refresh core
sudo snap install --classic certbot
sudo certbot --nginx -d yourdomain.com

echo "✅ Setup complete. Your Node.js app is now running behind Nginx with SSL on Kamatera!"
📌 Notes:
- Replace yourdomain.com with your actual domain name.
- If your app runs on a different port (e.g., 4000), edit the proxy_pass line accordingly.
- This script is designed for quick setup and demo purposes. For production-grade deployments, developers should further customize and harden the configuration.
⚡ Your backend deserves better than $5 shared hosting — Try Kamatera free now
Disclosure: This post contains affiliate links. If you use these links to sign up, we may earn a commission at no extra cost to you.